
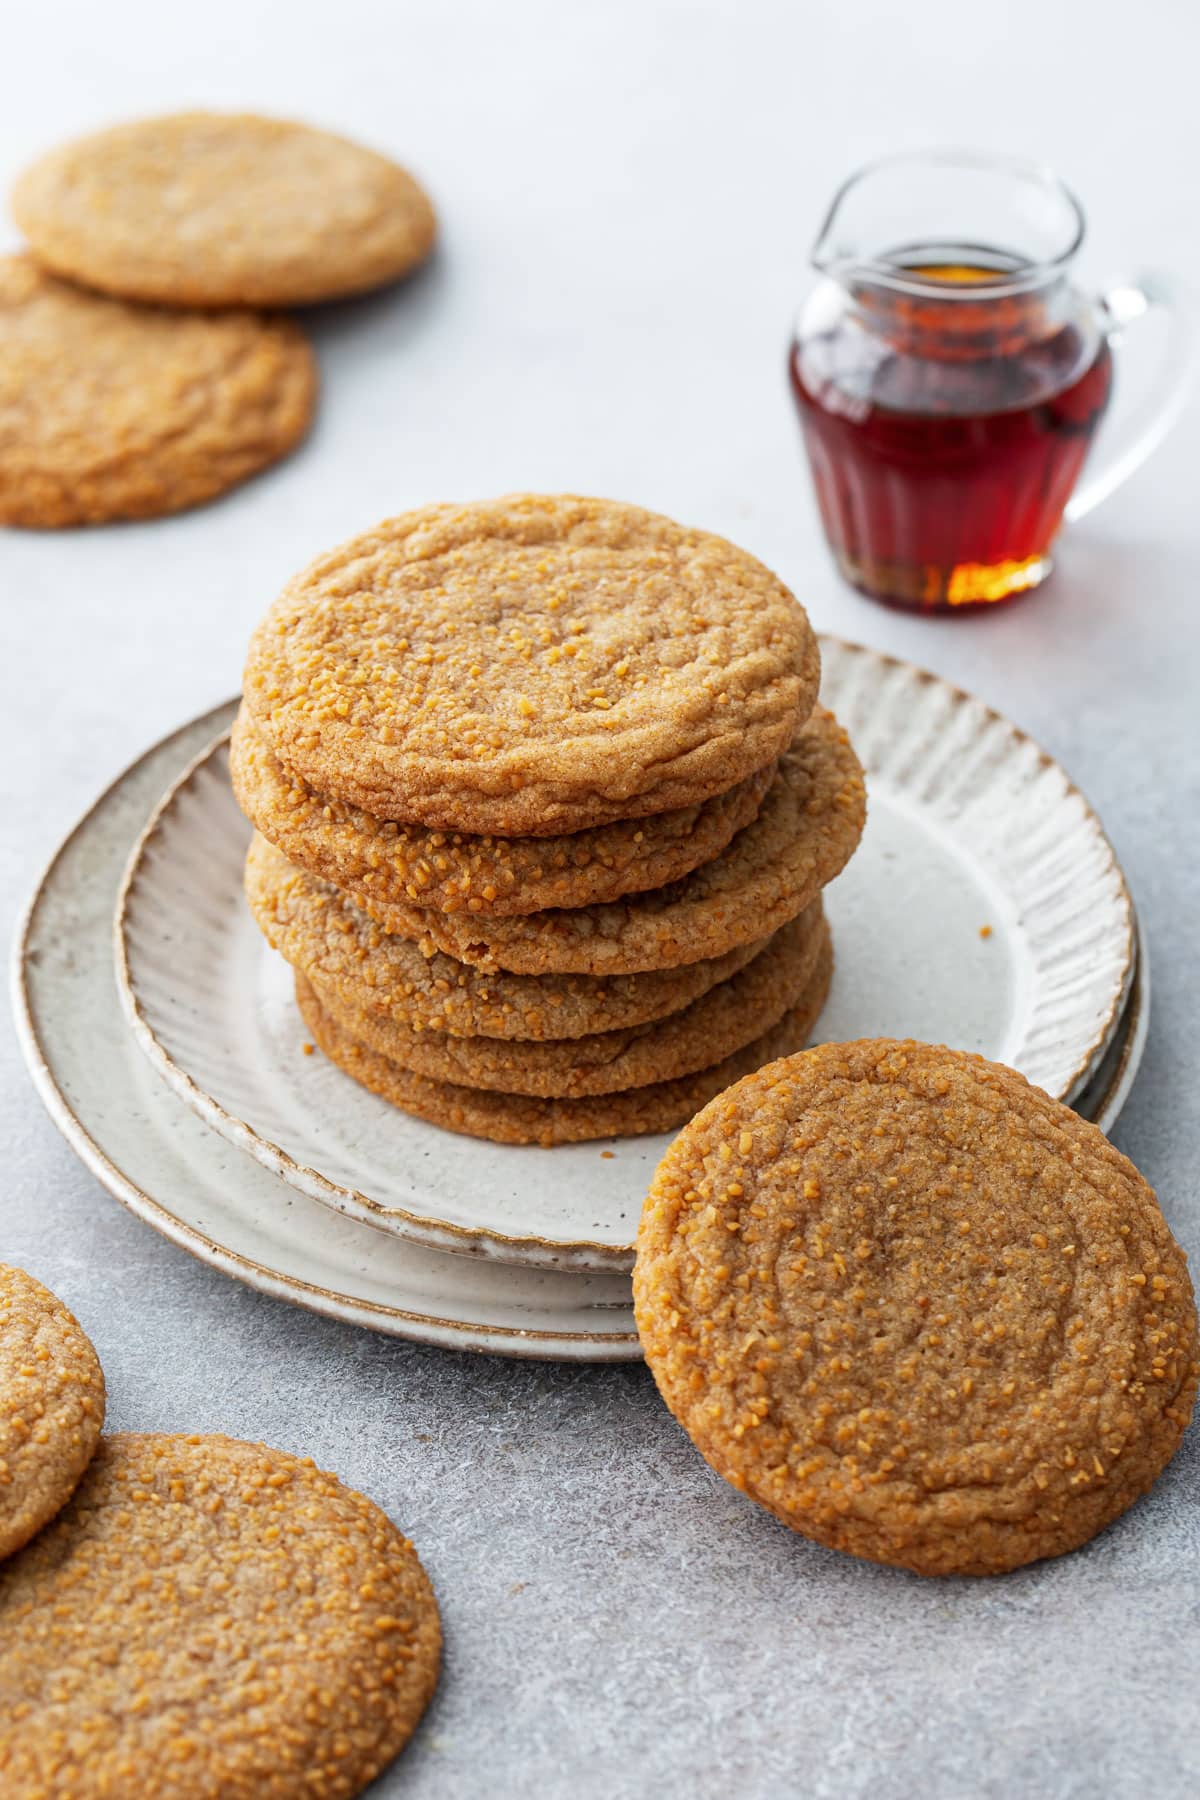
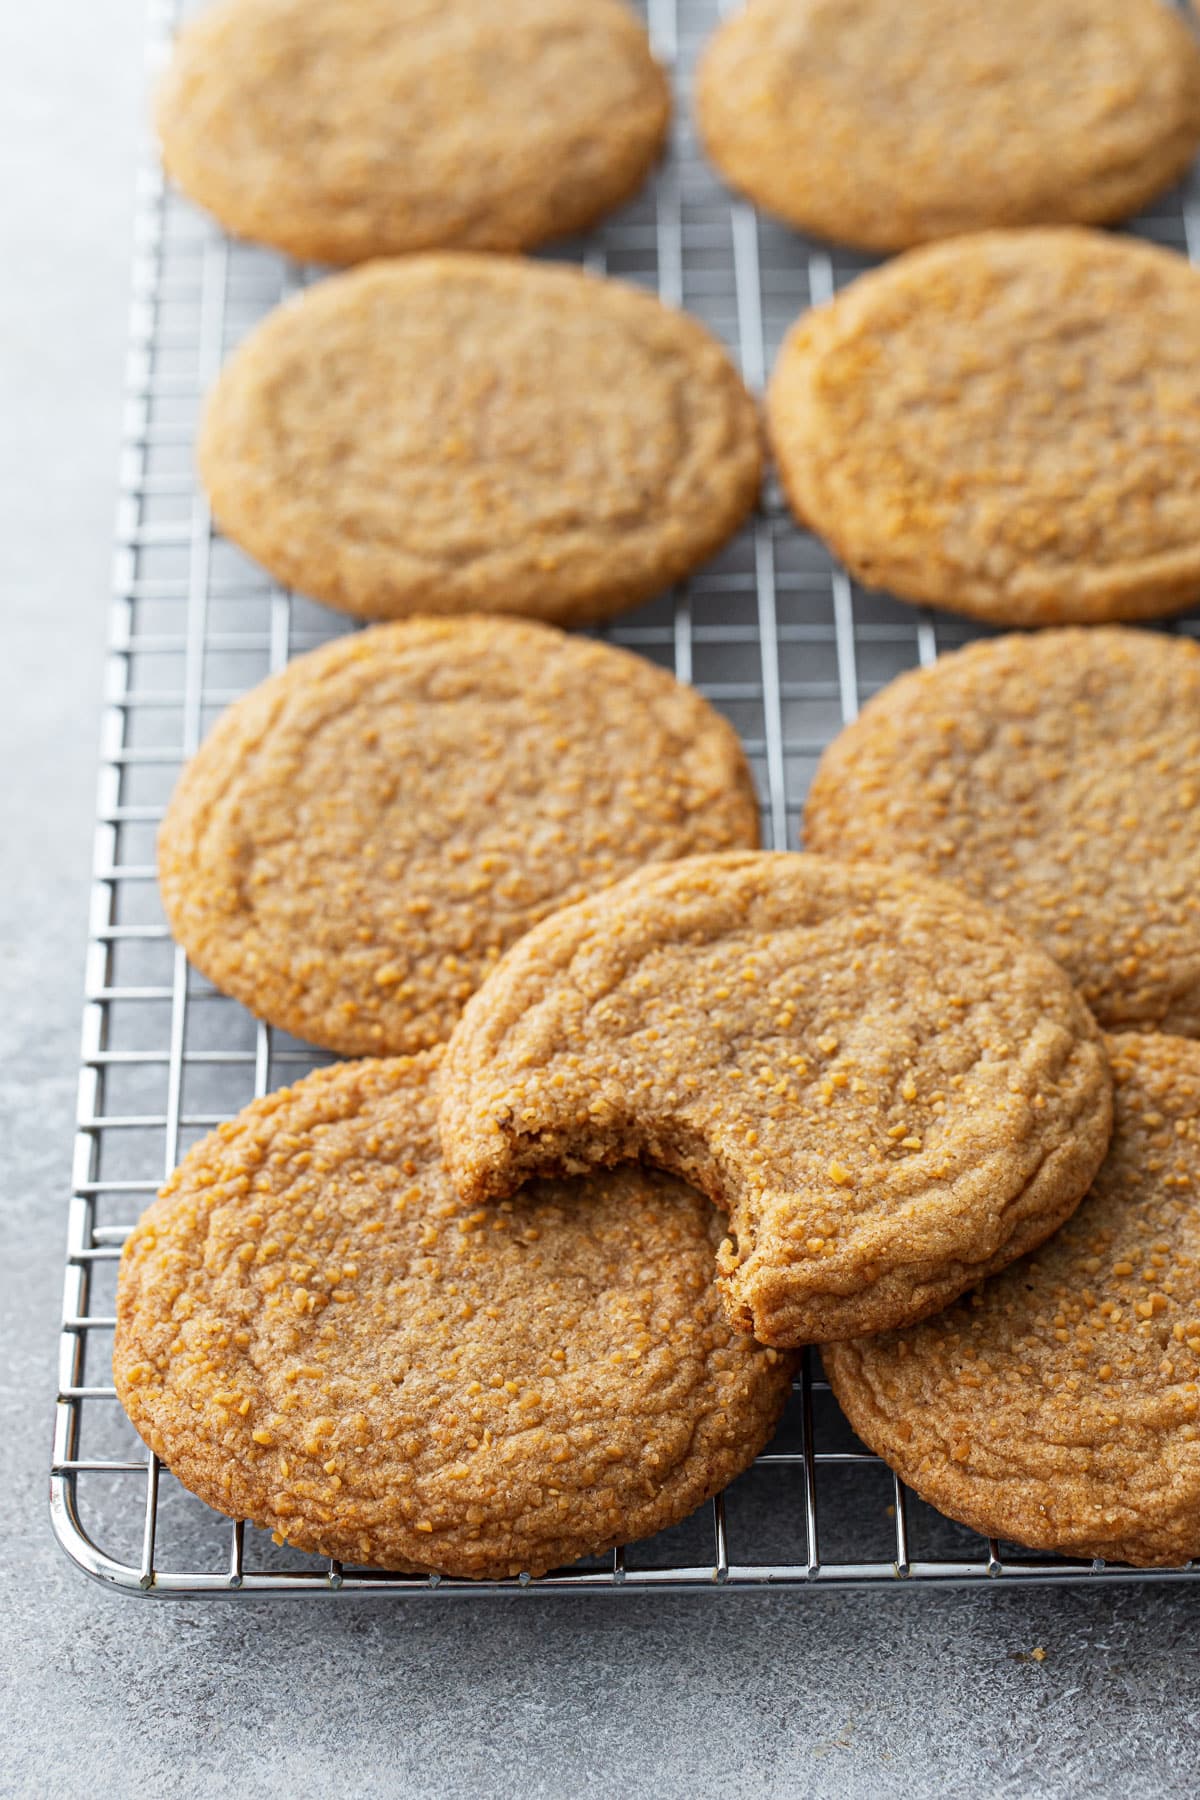
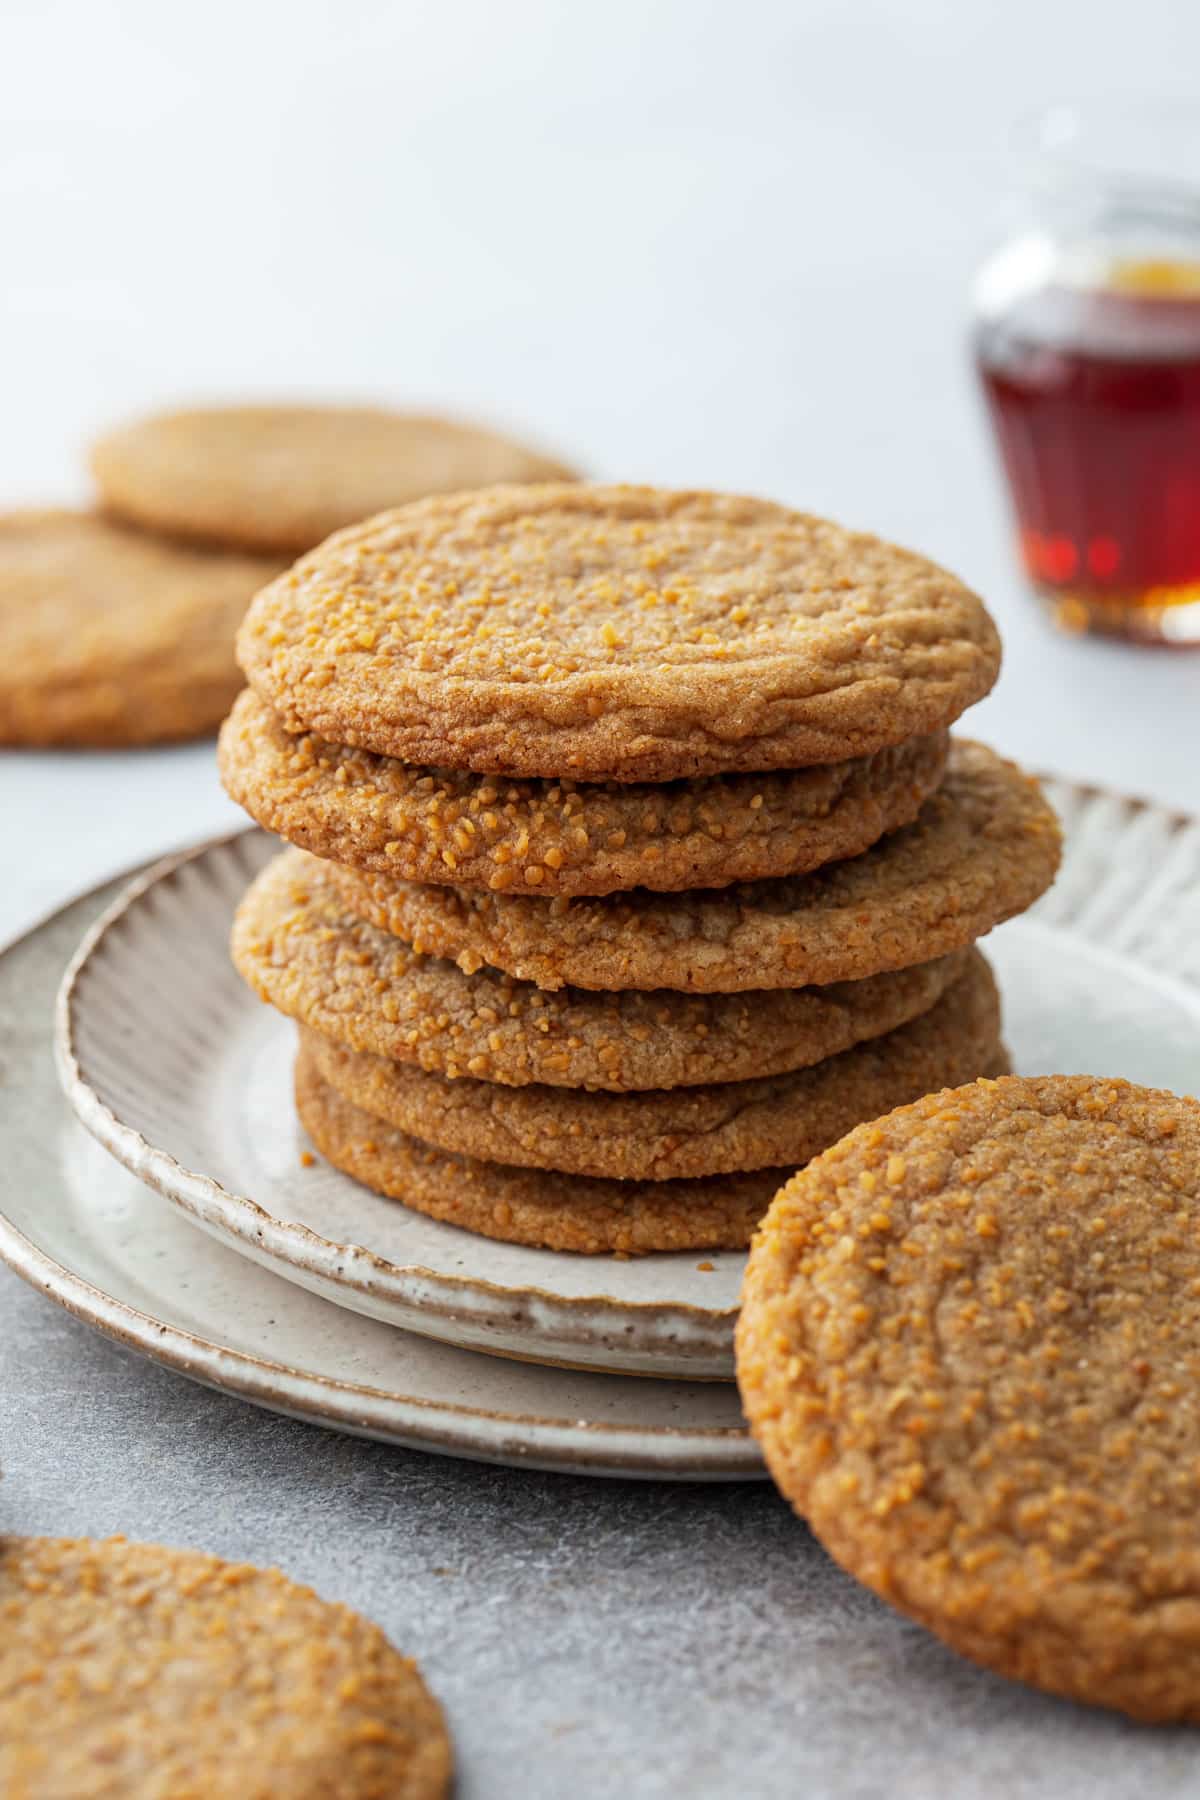
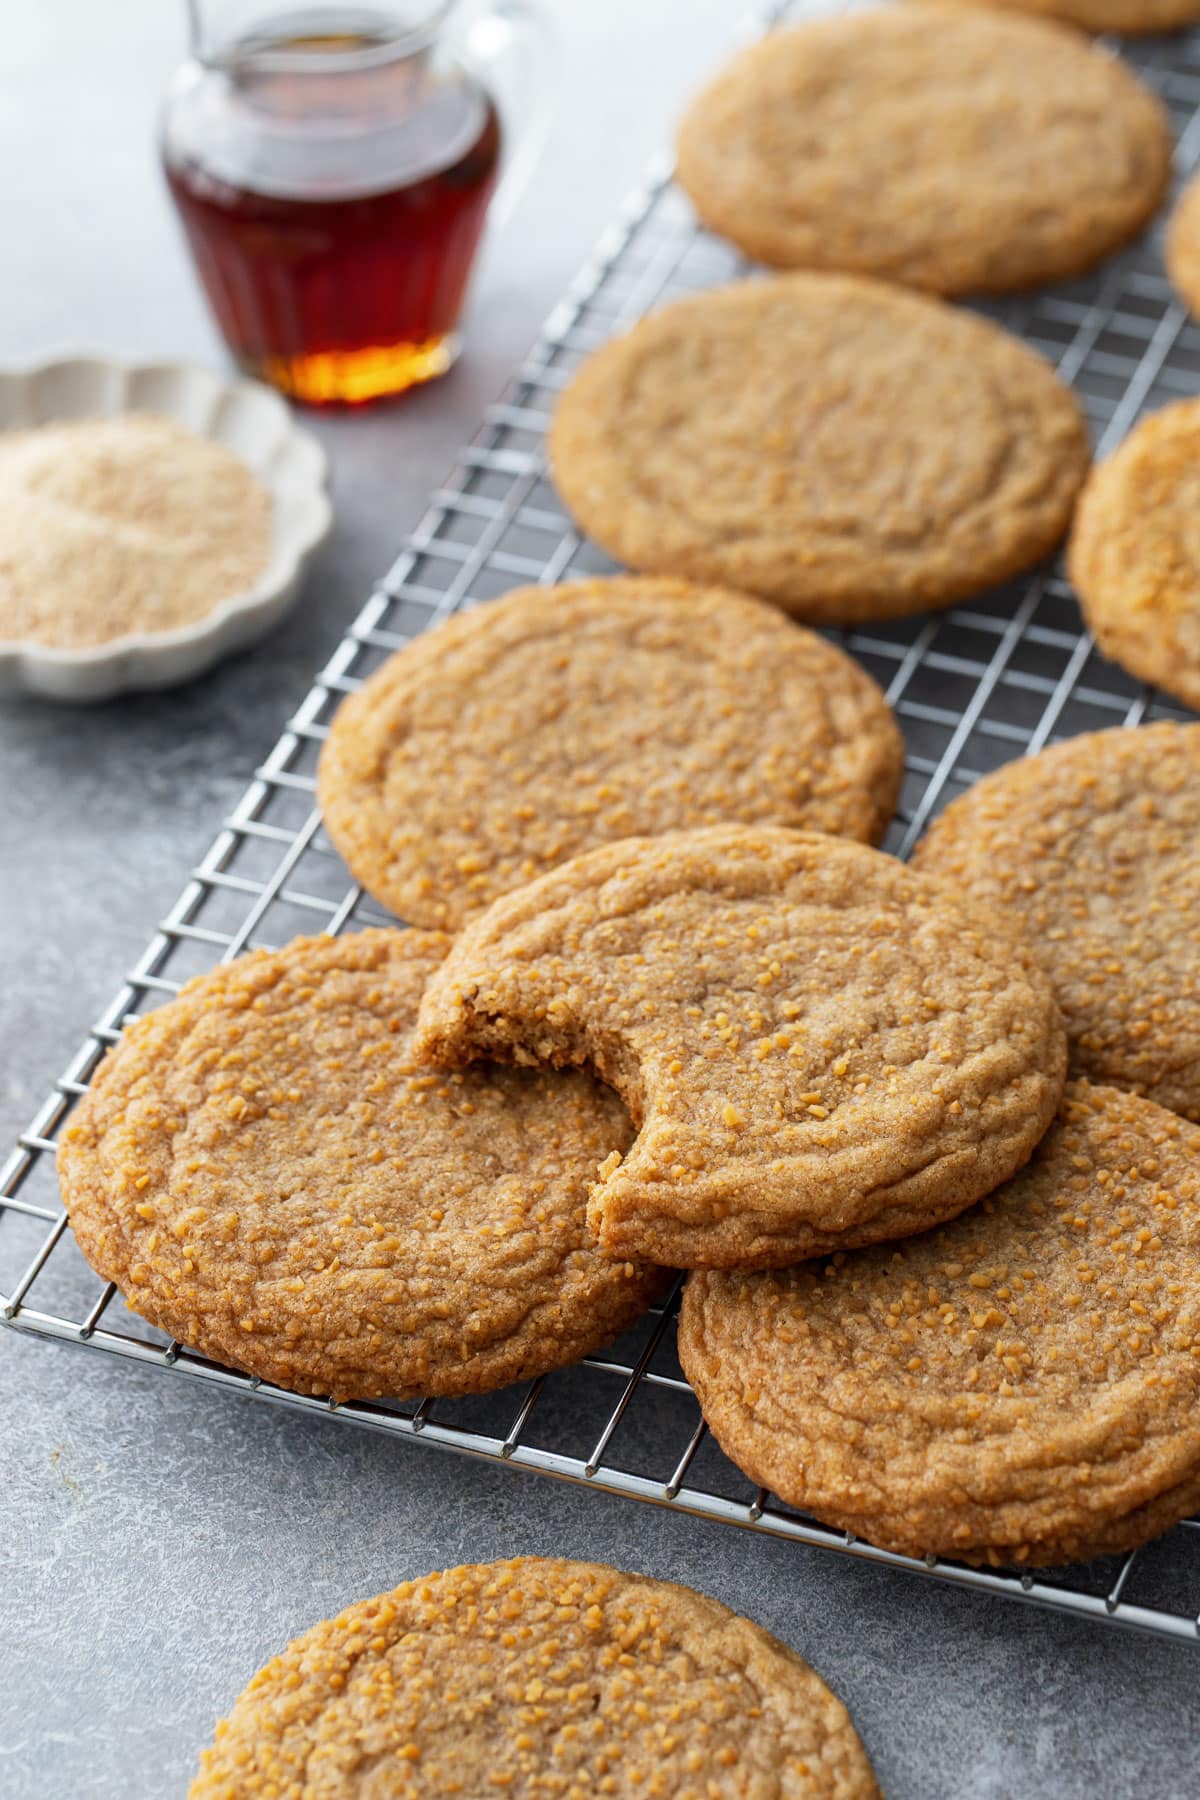
Impeccably chewy and packed with a triple dose of maple flavor (in the form of pure maple syrup, maple extract, and a maple sugar coating) these flavor-packed cookies are also made with browned butter for a toasty, nutty, and—especially when paired with maple— an almost butterscotch-like flavor.
And as an added bonus, because the dough uses brown butter in its liquid form, you don’t need to soften butter beforehand (win), the dough can be mixed entirely by hand without an electric mixer required (double win), and you can bake your cookies immediately, no chilling required (triple win)!
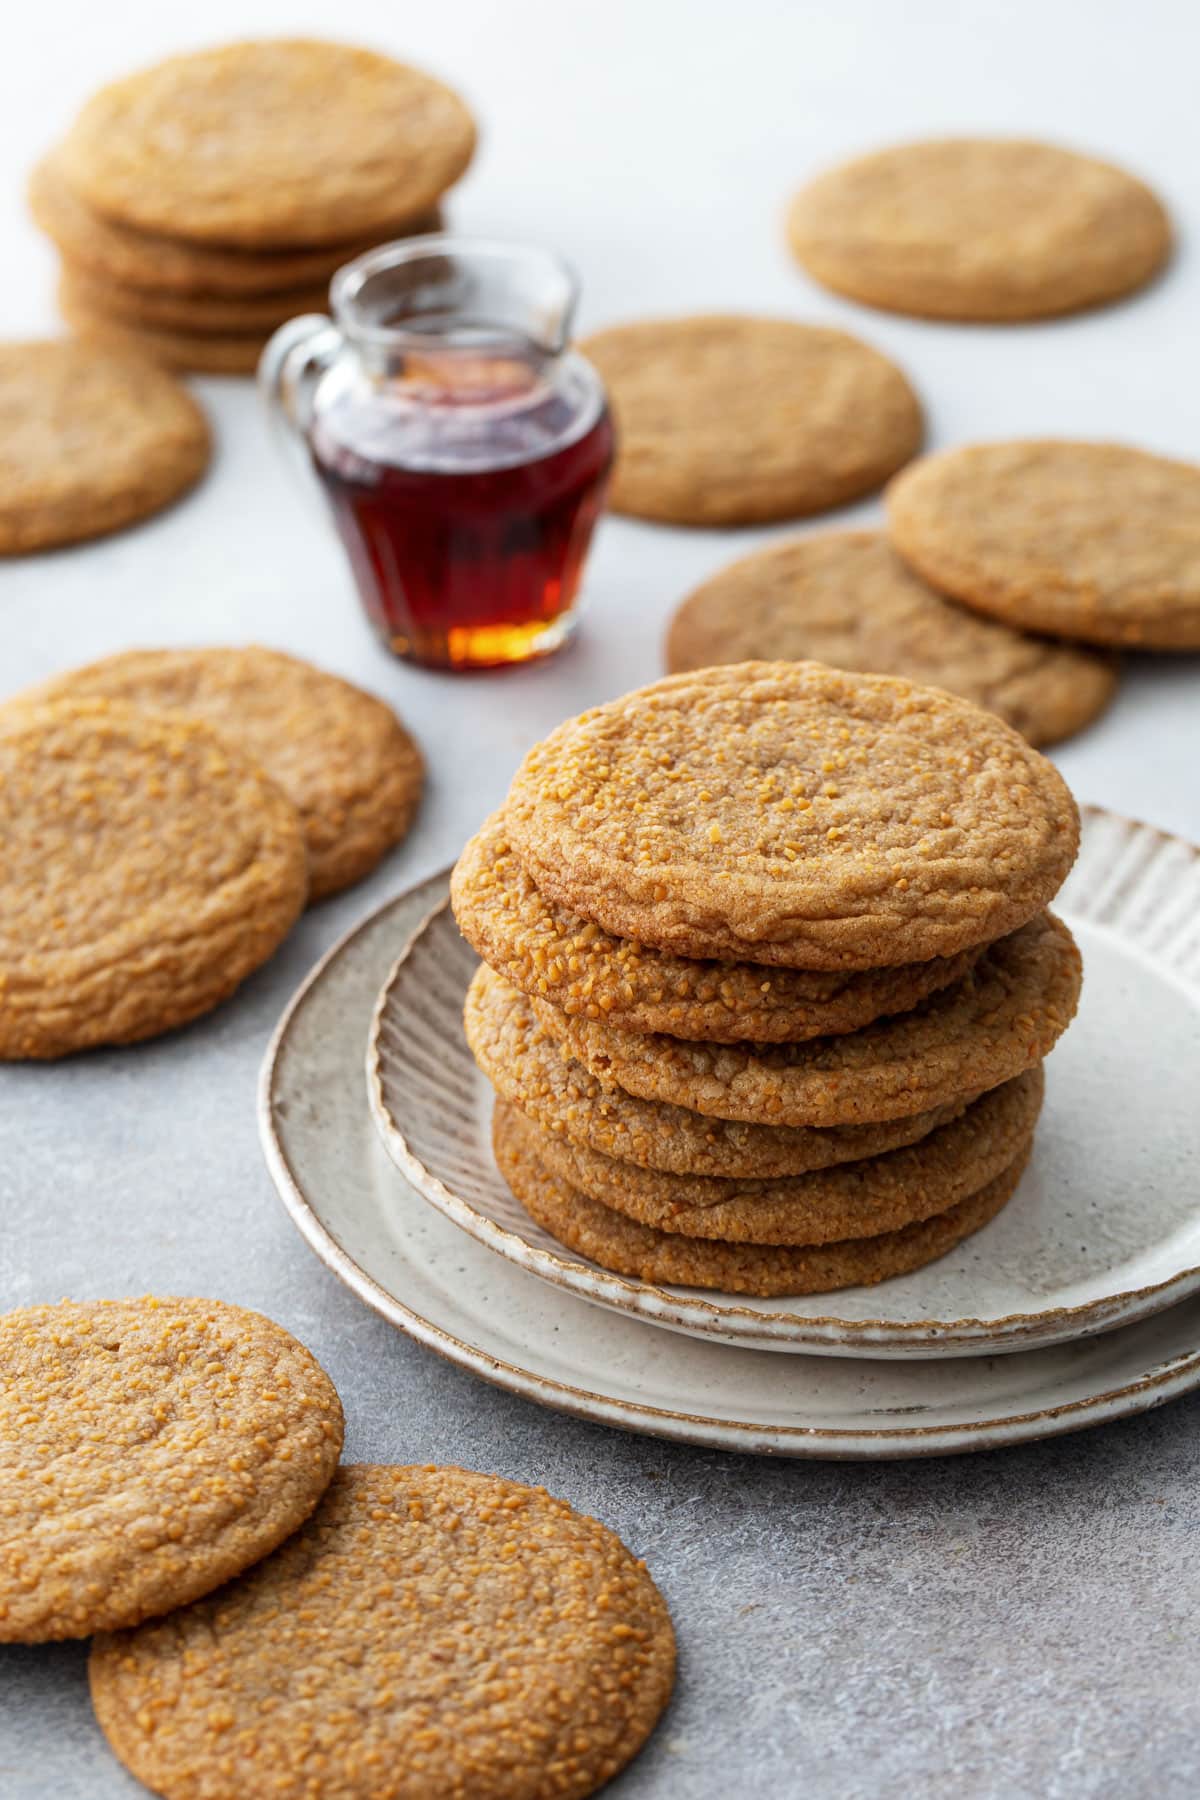
In terms of seasonal cookies, let’s think outside the box (and by box, I mean the ubiquitous fall/winter flavors of pumpkin, peppermint, and gingerbread). Maple might not be as widespread in fall baking recipes, but it certainly deserves the spotlight as much as its -ber month cousins, and these cookies are a great way to give maple its much deserved moment. Maple is, afterall, good for more than just pancakes!
I’m ashamed to admit I’ve been ignoring humble maple just as much as you have, as there are startlingly few recipes that use maple syrup in our archives. I definitely need to remedy that, stat!
In the meantime… these cookies are the best way satisfy your most urgent maple cravings short of a shortstack of pancakes. They’re just as chewy as your favorite molasses cookies, but with the unique flavor of maple shining through, plus delicately crispy edges and a touch of crunch from the larger grains of maple sugar. Add in a little brown butter for some roasty toasty goodness, and, well, you’ve got yourself a smashing success of a cookie.
I originally tried to adapt my molasses chocolate chip cookies using maple in place of molasses, but quickly realized the two are not interchangeable. Maple syrup has a much higher water content, which changes the texture of the cookie (my first batch was very puffy and cakey).
Maple is also a somewhat subtle flavor when mixed with other ingredients like butter and flour, and again, the first batch, despite having a full 1/3 cup of maple syrup, barely tasted like maple at all.
Ultimately, after 5 additional rounds of testing, I ended up with a triple threat of maple for maximum flavor:
- Maple syrup, reduced slightly to intensify the flavor and reduce the water content.
- Maple extract, a super concentrated maple flavor that shines through in the final bake.
- Maple sugar, as a coating on the outside of the cookies to add even more maple flavor and a subtle crunch to the outsides of the cookies.
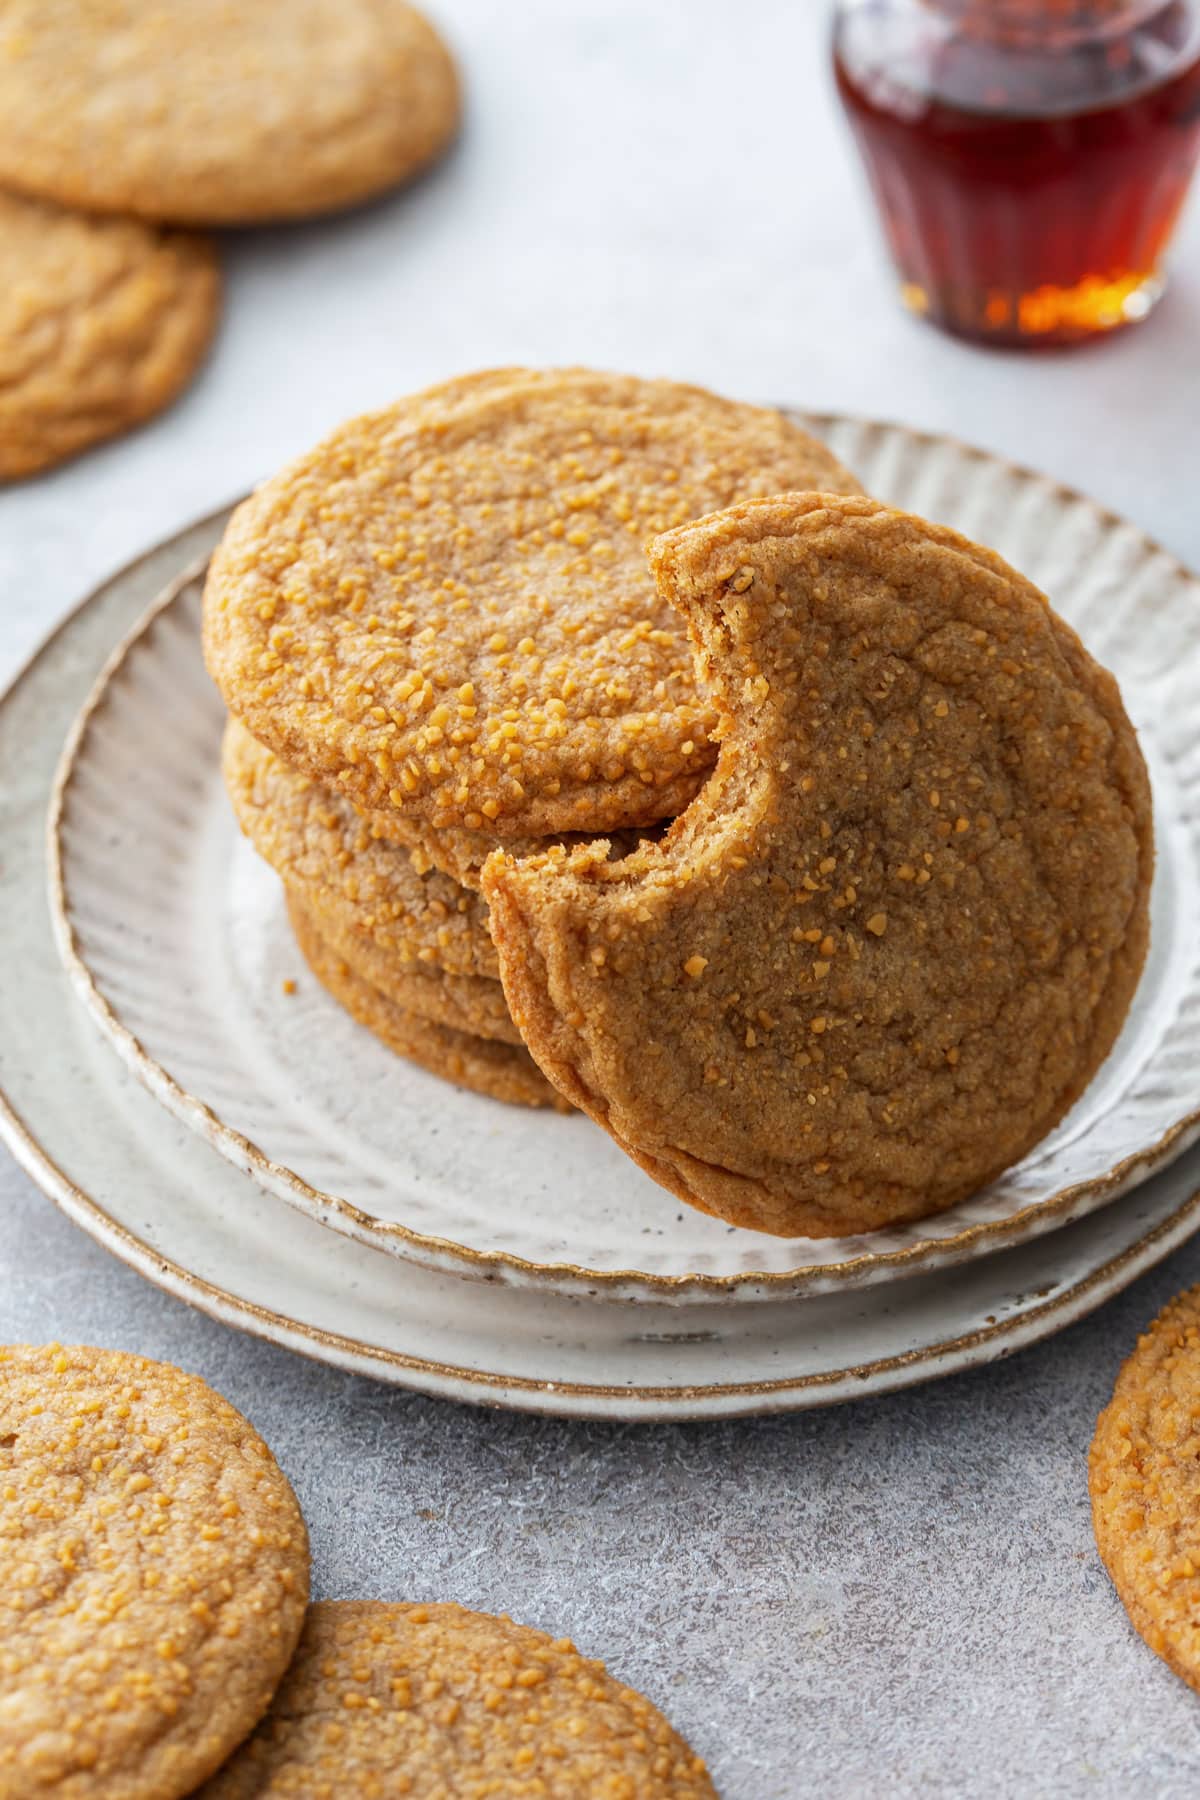
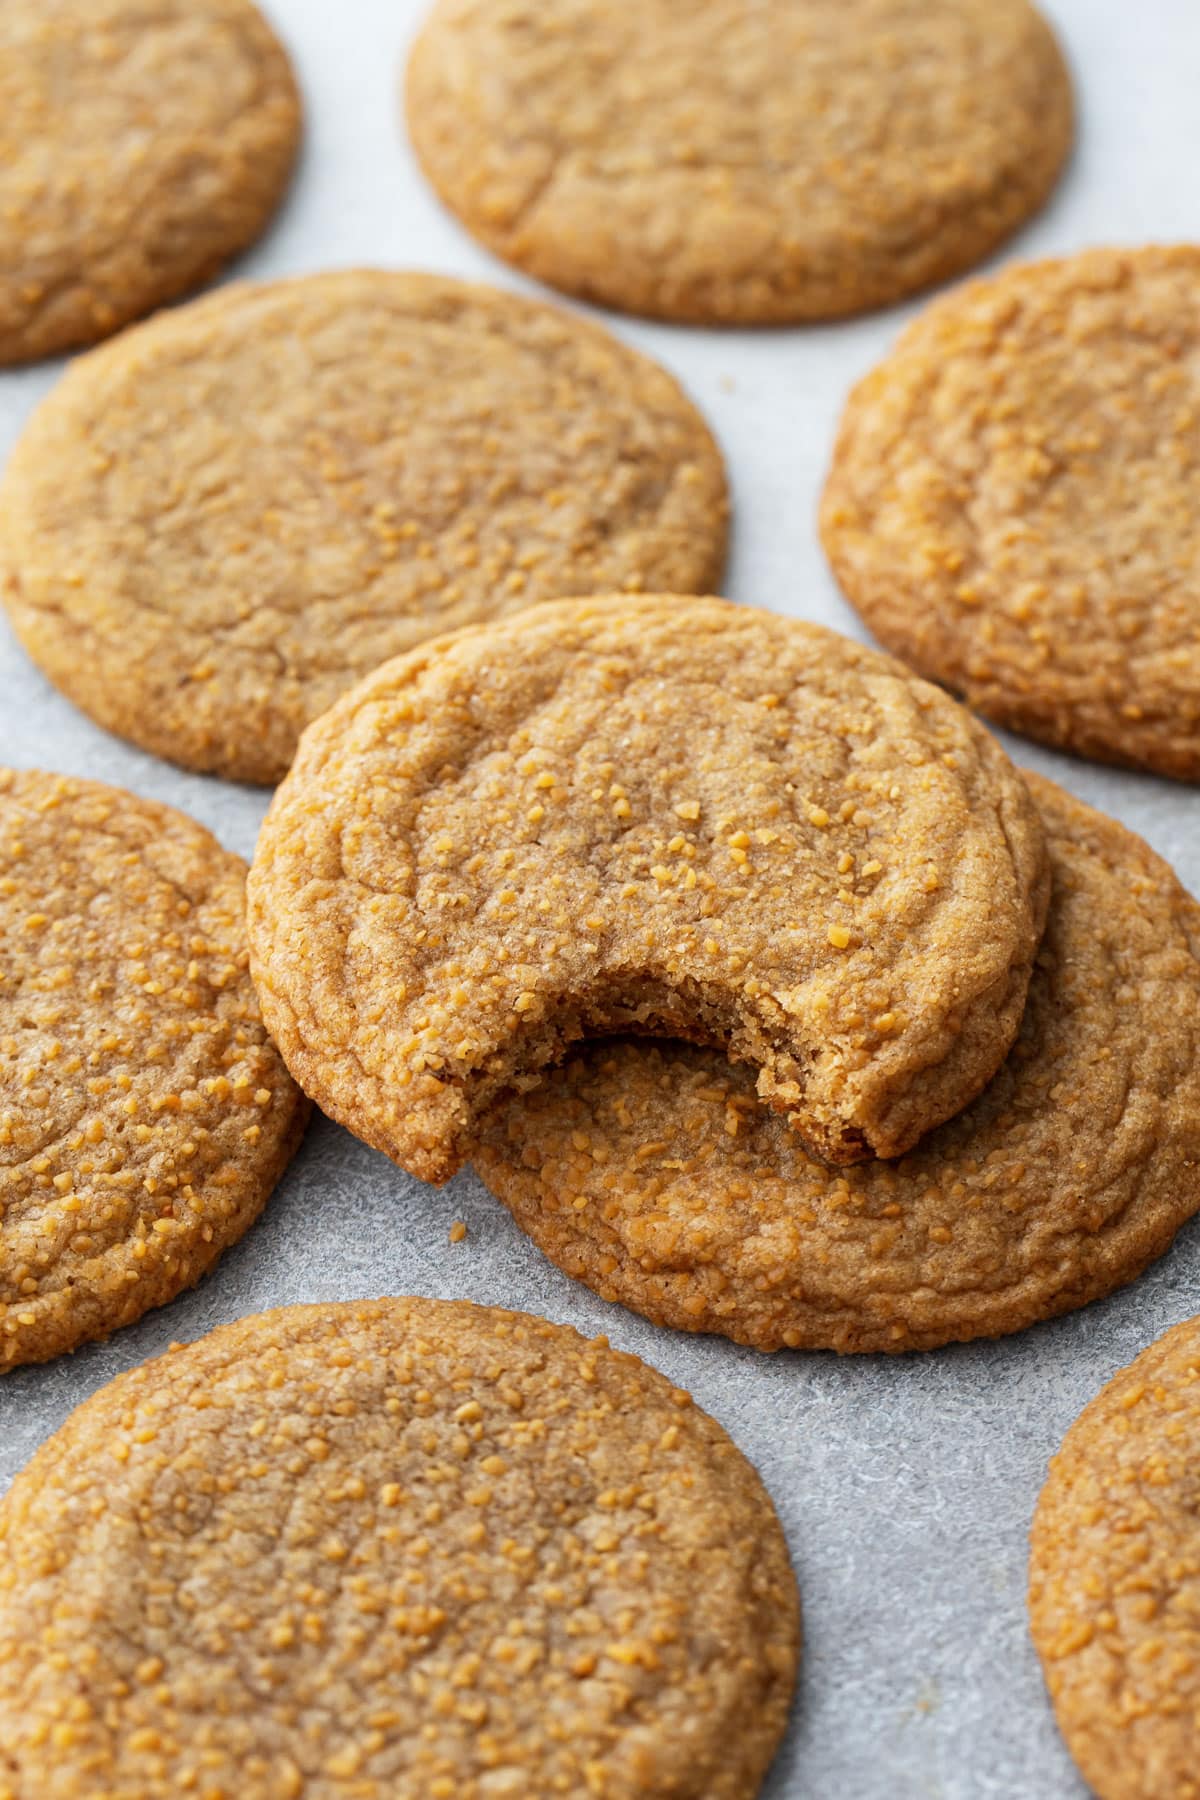
They might look plain, but the taste is anything but. Sure, I could have added a maple glaze or white chocolate drizzle or some candied nuts or something else to make them look a little snazzier, but the cookies are truly exceptional on their own, no fancy flourishes required.
Another thing I toyed with when testing this recipe was mix-ins, namely toasted pecans and chocolate chips. And while the version with the chocolate chips and toasted pecans was undeniably–dare I say ridiculously good, I ultimately decided to present the final recipe in its purest form (but see below if you want to add mix-ins!)
Personally I love the impeccably chewy texture, unmarred by any textural intrusions. The cookies alone are so satisfyingly chewy, with delicate crispy edges and a subtle crunch on the outside from the larger grains of maple sugar, while the inside is pure, chewy bliss. Why mess with perfection?
Interestingly enough, I found these cookies get even better the second day, with a more pronounced maple flavor and chewier texture. While they don’t dry out as easily as many other cookies (thanks to the excess of hydroscopic ingredients like brown sugar), I do recommend to store them at cool room temperature or refrigerate in an airtight container, or wrap them in plastic wrap and freeze in a zip-top bag (as with many of my other cookie recipes, I prefer freezing these cookies after baking, rather than freezing the unbaked dough balls; somehow they come out of the freezer even chewier than when they went in!)
Life is butter dream.
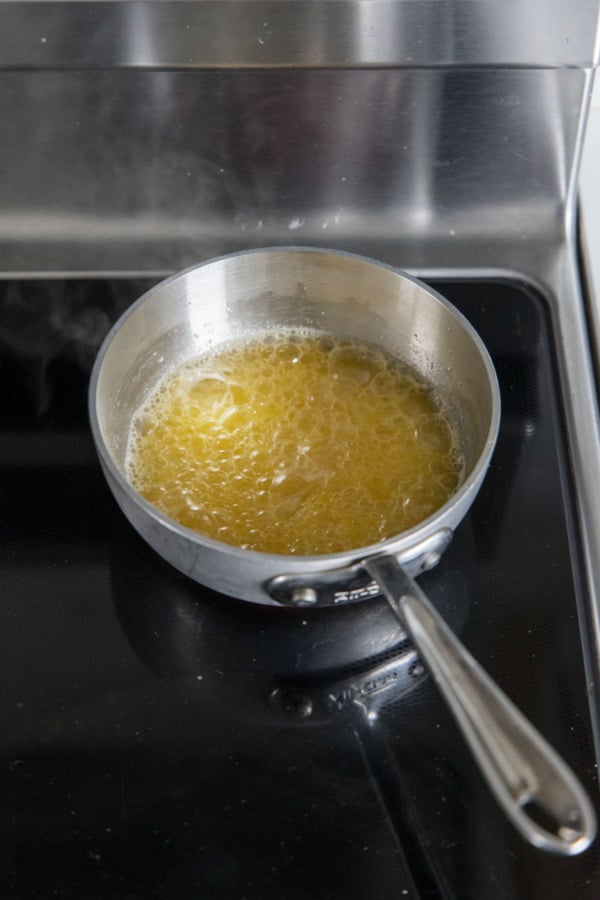
The choice to brown the butter in this recipe was twofold: to add a robust nutty flavor that compliments the butterscotch notes of the maple, as well as to reduce the moisture content for the chewiest possible results.
Additionally, I’ve been hearing tales of butter formulas changing and ruining batches of cookies. While legally butter in the US must be at least 80% butterfat, there’s probably still some wiggle room in there that I’m sure some companies are taking advantage of in this economy.
I tested this recipe with two different brands of butter. One reduced from 144g to 119g (a 17.4% reduction), the other reduced from 143g to 112g (a 21.6% reduction, which would actually put this butter BELOW the legal 80% butterfat). Since the process of browning butter essentially evaporates any and all water from the butterfat, it appears that the latter butter obviously had a higher water content than the former. Would an extra 6g (about a teaspoon) of water make a difference in a cookie recipe? I can’t really say, but it’s an interesting observation nonetheless, and something I’m curious to test more thoroughly.
The good news is, since the process of browning butter removes the excess water, this isn’t something you need to worry about, for this recipe at least!


Mix it up.
While I opted for a pure, unmarred texture here (I really wanted the chewy texture and maple flavor to shine), this recipe also works great with added mix-ins. I tested versions with both pecans and dark chocolate chips, as well as just pecans, and both versions were delicious.
If you want to add mix-ins, just stir them in at the very end when the flour is almost fully incorporated. I’d suggest about 1/2 cup of dark chocolate chips and 1/2 cup of toasted chopped pecans, but you can also use other nuts, dried fruit, toffee bits and the like.
Cookie Troubleshooting
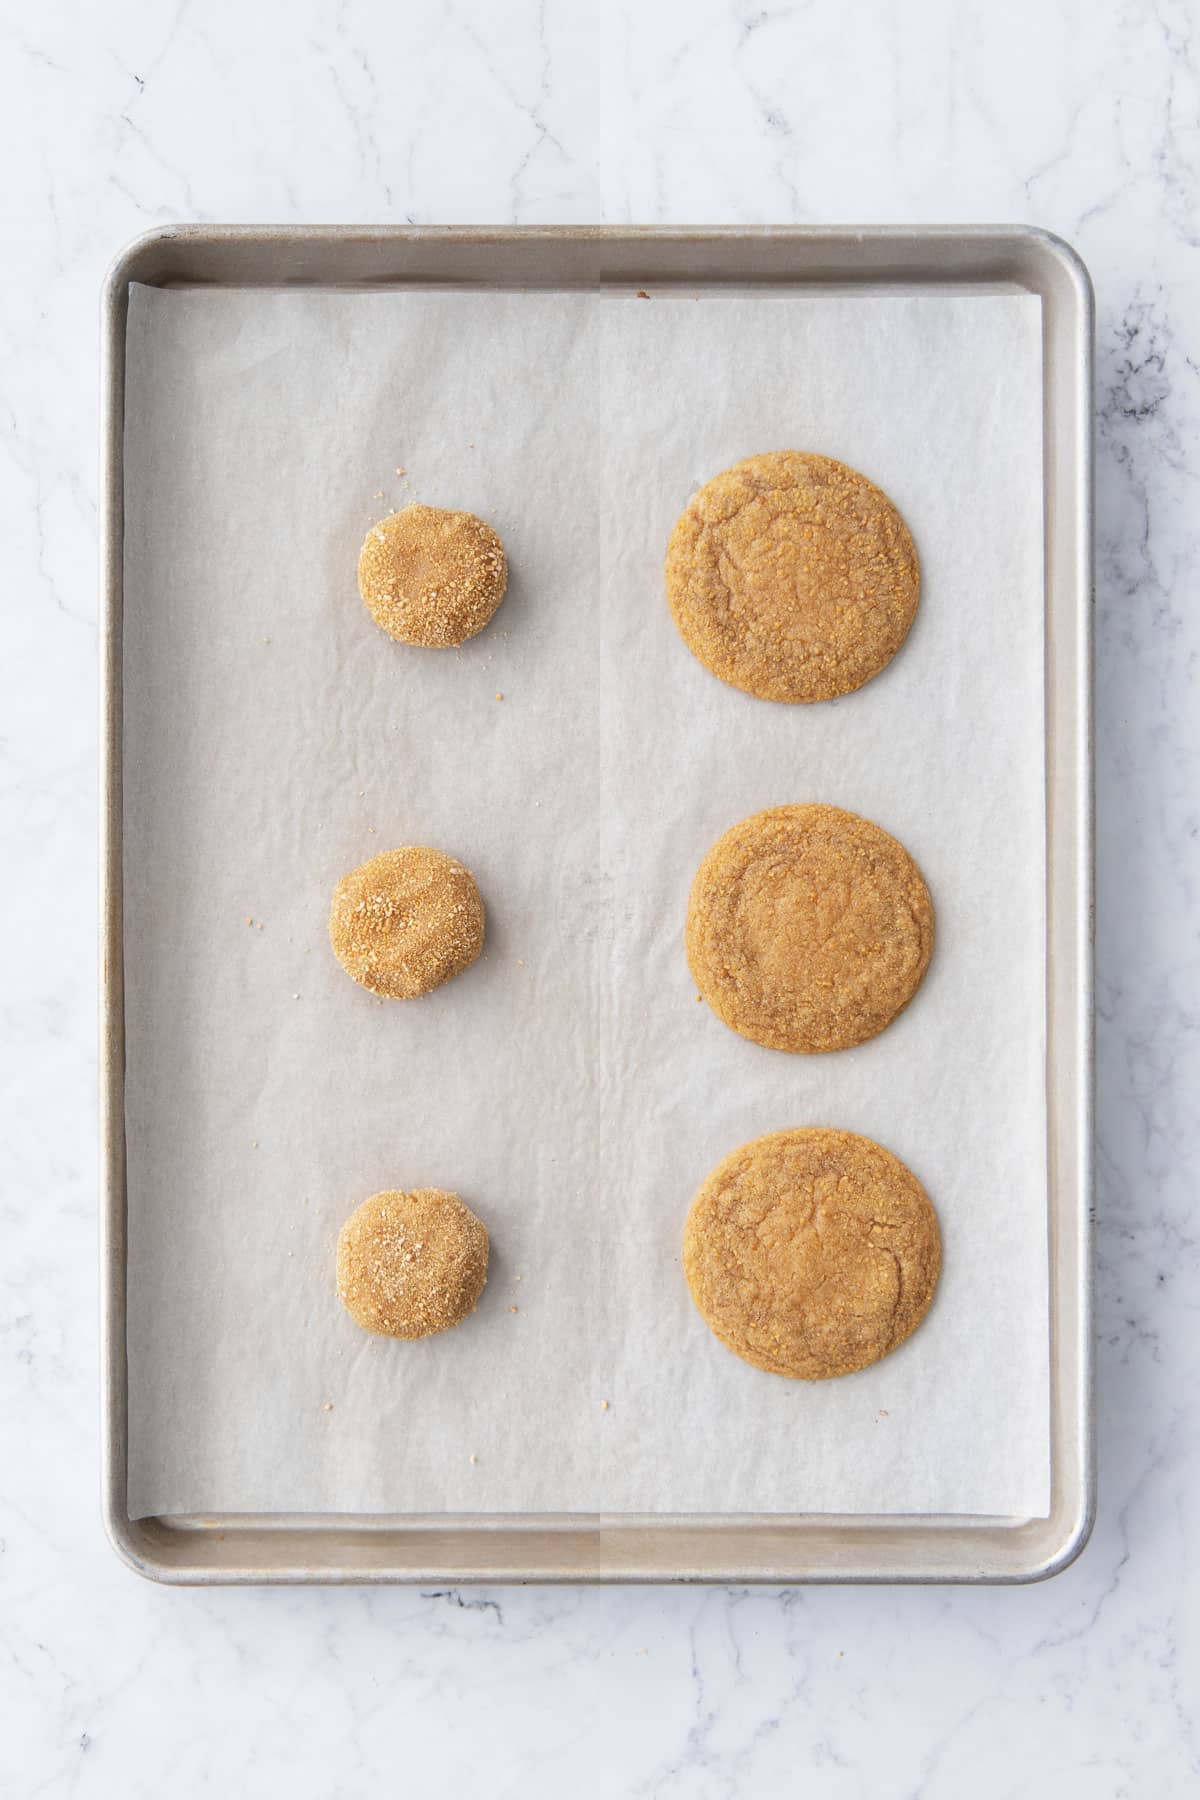
Getting your cookies to spread just the right amount can be a bit of a guessing game, and small variables like the calibration of your oven, thickness of your baking sheet, and precision of your measurements can make huge differences in how much or little cookies spread.
Personally I like fairly flat cookies, with an even consistency across the whole cookie, slightly crisp edges and perfectly chewy (not gooey) everywhere else. That was my ultimate goal for this recipe, and it definitely took me a few trials (read: 6 batches) to get it right.
I always recommend baking off a few test cookies first, 2-4 on a single cookie sheet, and then you can make adjustments as needed for the rest of the batch!
If your cookies don’t spread enough:
The issue is likely too much flour, usually from using volume measurements rather than weight. Even an extra 10g of flour can make a big difference in the spread of cookies, which is why I always recommend weighing your flour whenever possible (other ingredients aren’t quite as particular).
If the flour isn’t the issue… did you reduce the sugar, by any chance? It’s ok, you can be honest. Just know that sugar does more than add sweetness to a recipe, it also contributes to the texture and yes, the spread of cookies like these. Using less sugar than the recipe calls for will result in puffier, less chewy cookies.
Obviously you can’t remove flour from the dough, and adding sugar late in the process isn’t really doable, but if your cookies aren’t spreading enough a few things you can try:
- Reduce the oven temperature. Baking cookies at a slightly lower temperature (15-25 degrees) for a few minutes longer produces cookies that spread out more. While I already call for a lower-than-normal temperature (325) it may be your oven runs hot, so try bumping it down a few degrees.
- Use room temperature dough. No chilling. Or if your dough has been chilled, let it come back to room temperature before baking.
- Press the dough balls into slightly flattened pucks. Instead of perfectly round balls, flatten them slightly into puck shapes before putting them in the oven.
- Bang that pan! Giving the cookie sheet a good bang bang on the counter, or even on the oven rack, once or twice during the baking process (I suggest one bang at 9 minutes and another when they’re done). This helps knock out some of the air and deflate the puffy centers a bit.
- Add some baking soda. Adding a little more baking soda may help the cookies spread out a bit! Try 1/4 teaspoon to start, sprinkle it over the dough and mix it in as well as you can. This should be your last resort though, as it’s hard to get an ingredient like baking soda evenly mixed in after the dough comes together. The reason I know this? I indeed forgot the baking soda entirely when testing a different cookie recipe recently, so (needless to say those cookies barely spread AT ALL).
If your cookies spread too much:
On the other side of the spectrum, cookies that spread too much are usually lacking in flour or have too much sugar or fat. Again, accurate measurements are key here!
If your first pan of cookies spreads too much, you can still save it! Here are a few things to try:
- Mix a bit more flour into the dough. A tablespoon or two of flour makes a huge difference and should help the cookies hold their shapes better.
- Chill the dough. While I intentionally wrote this recipe so that the dough doesn’t require chilling, using colder dough will prevent the cookies from spreading as much.
- Increase the oven temperature. Baking cookies slightly hotter (350 instead of 325) for a shorter period of time will produce taller cookies. Try 350 for 8-9 minutes to start! The edges might brown a bit more quickly at this temperature, and the centers will be softer, but they shouldn’t spread quite as much.
- Add (more) mix-ins. Mix-ins like nuts and chocolate chips prevent cookies from spreading as much, so adding some will help the cookies hold their shapes better.
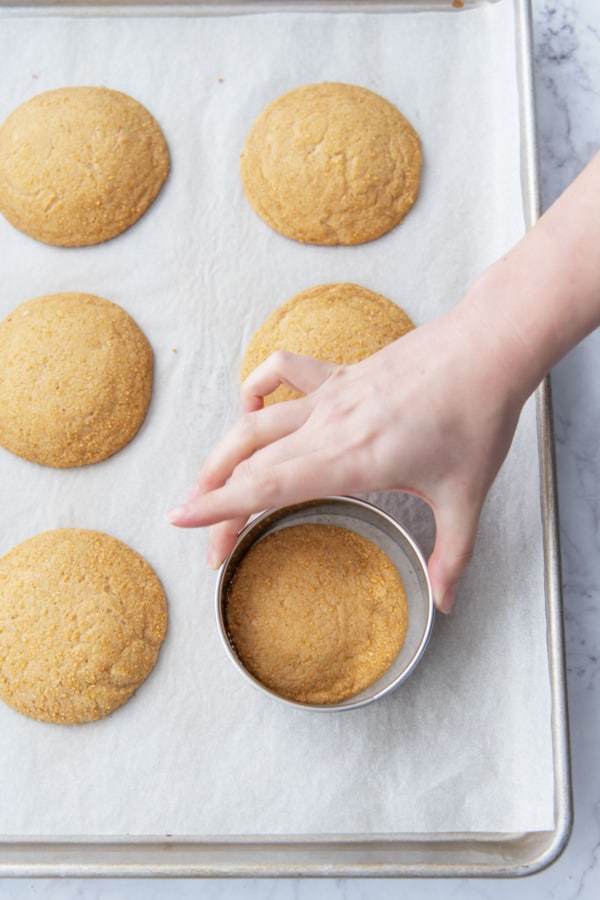
Give them a swirl! You can somewhat save cookies that spread out too much post-bake by using the cookie cutter trick: immediately after taking them out of the oven, swirl a large round cookie cutter around the cookie, which will ‘tuck in’ the edges and make for perfectly round cookies. I do this with pretty much all my cookies to help produce more uniform results.
Ingredient Notes & Substitutions
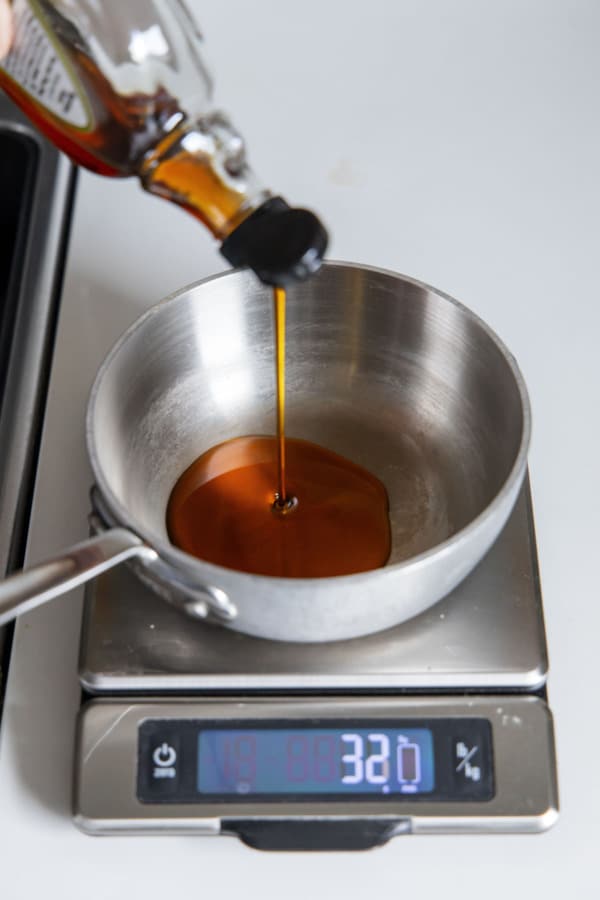
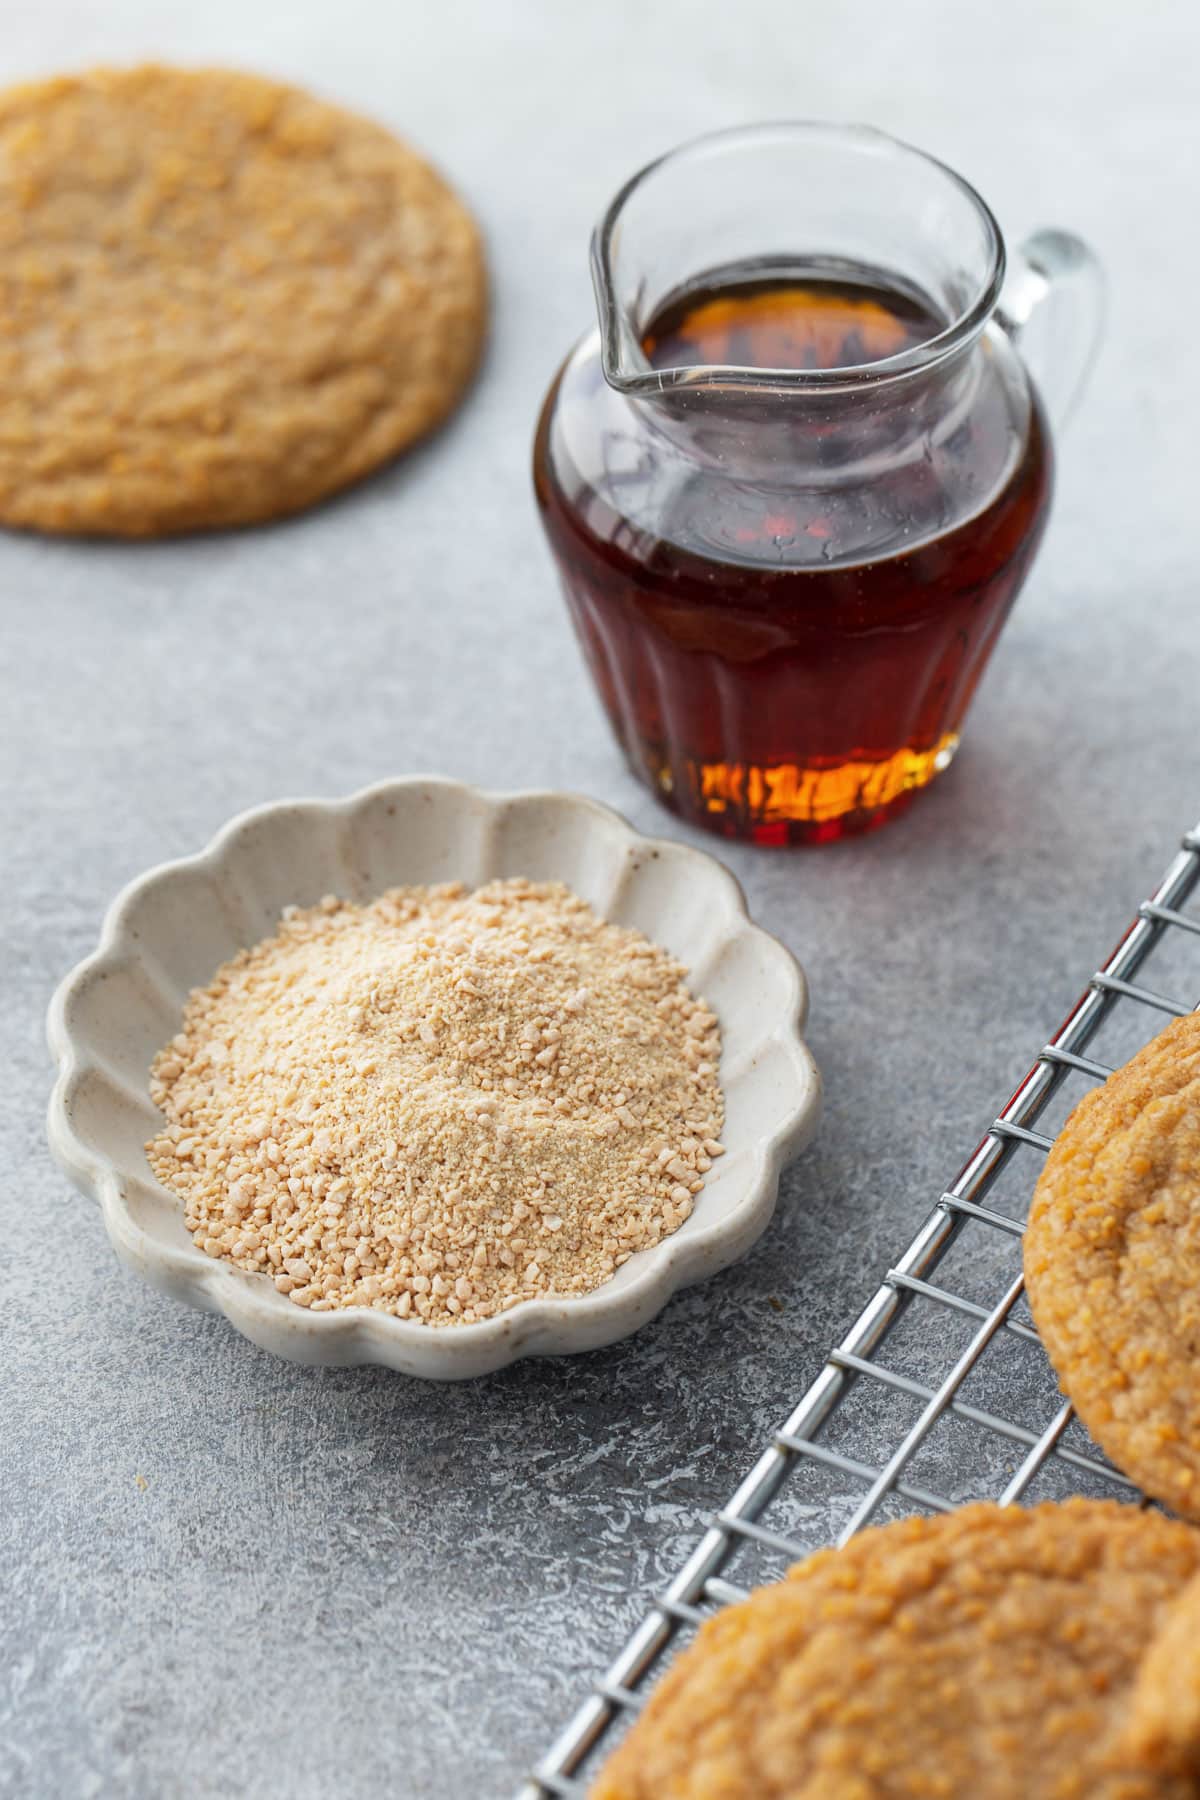
Maple syrup: Use real maple syrup for this recipe, not pancake syrup. I used a relatively inexpensive store brand dark maple syrup (the darker styles, sometimes labeled grade B, have a more robust flavor that will come through better in the final bake). If your syrup is already pretty thick (higher quality syrups are), you can probably skip the reducing step, but most affordably priced maple syrups are on the thin side, and I would definitely recommend reducing them slightly first. Reduced or not, you want 100g of syrup to go in to your recipe. That’s a scant 1/3 cup if measuring by volume.
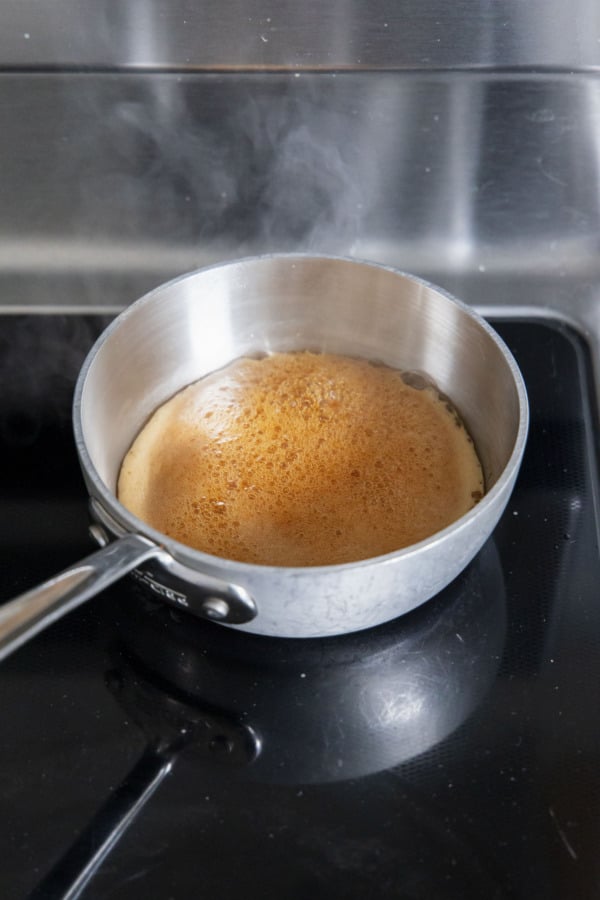
To reduce maple syrup and make it thicker, bring the syrup to a simmer in a small saucepan over medium heat. I recommend weighing your empty saucepan before you start, then you can easily put the whole pan on your scale during the cooking process to measure exactly how much water has evaporated. For me, reducing 120g of maple syrup to 100g took about 2 1/2 minutes at a frothy boil.
Maple extract: Even with 1/3 cup of pure maple syrup in these cookies, the maple flavor isn’t super obvious. If you want to actually taste the maple, maple extract is a must. I tested this recipe with both McCormick (alcohol based) and Frontier Coop (glycerine based), and both worked great in equal amounts. You can leave it out without affecting the appearance of the final cookie, just know you’re really not going to get much maple flavor in the final cookie.
Maple sugar: Maple sugar is basically dehydrated and crystallized maple syrup, and another way to add some more maple flavor in these cookies. It’s not cheap though, so I still used mostly brown sugar in the cookies themselves, and saved the bulk of the maple sugar to coat the dough balls before baking. You can definitely use turbinado sugar for the outside coating if you don’t have maple sugar, but it really does have a lovely flavor and worthwhile to track down if you can.
If omitting the maple sugar, increase the brown sugar by 10g in the dough, and use turbinado or granulated sugar for the outside coating instead.
Brown sugar: I recommend light brown sugar for this recipe (dark brown sugar has a stronger molasses flavor that can overpower the maple). If you omit the maple sugar in the dough itself, I’d recommend increasing the brown sugar to 160g (a scant tablespoon or so) just to keep the sugar level consistent, as reducing the sugar will result in cookies that are puffier, not as chewy, and don’t spread as much.
Butter: I used American-style unsalted butter. If you opt for salted butter, reduce the salt to 1/4 teaspoon. If you use European style butter, which has a lower water content, you may end up with slightly more brown butter in the end. It’s not a huge difference, but if you want to be exact about it, measure out 114-115g after browning to match my batch.
Chewy Brown Butter Maple Sugar Cookies
Impeccably chewy and packed with a triple dose of maple flavor (in the form of pure maple syrup, maple extract, and a maple sugar coating) these flavor-packed cookies are also made with browned butter for a toasty, nutty, almost butterscotch-like flavor.
-
Preheat oven to 325 degrees F. Line your baking sheets with parchment paper.
-
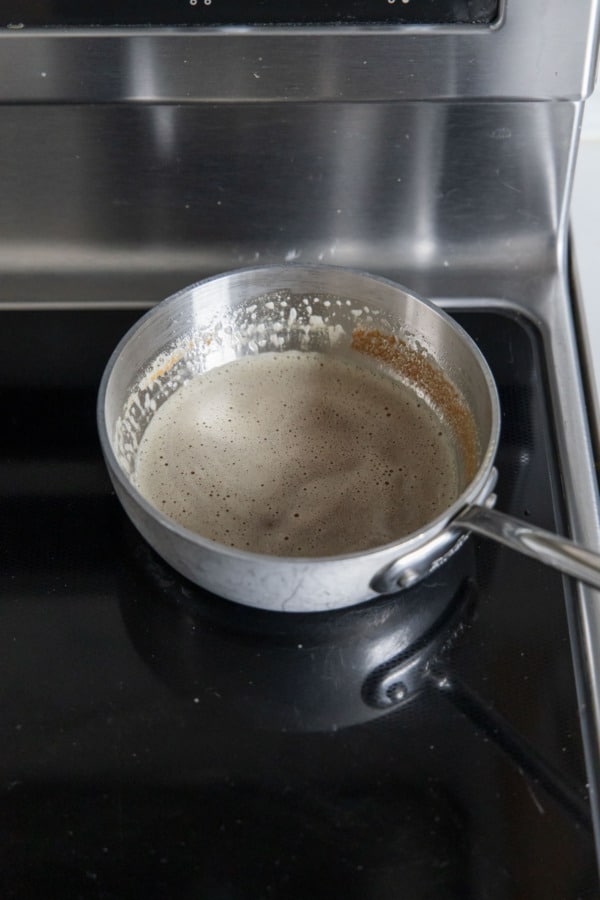
To brown butter, melt butter in a small saucepan over medium heat, until it starts to simmer and sputter. Continue to cook, stirring occasionally, until the sputtering ceases and the butter solids start to turn golden brown. Remove from heat and pour into a heat-proof mixing bowl, scraping all the browned bits from the pan, and set aside to cool slightly.
-
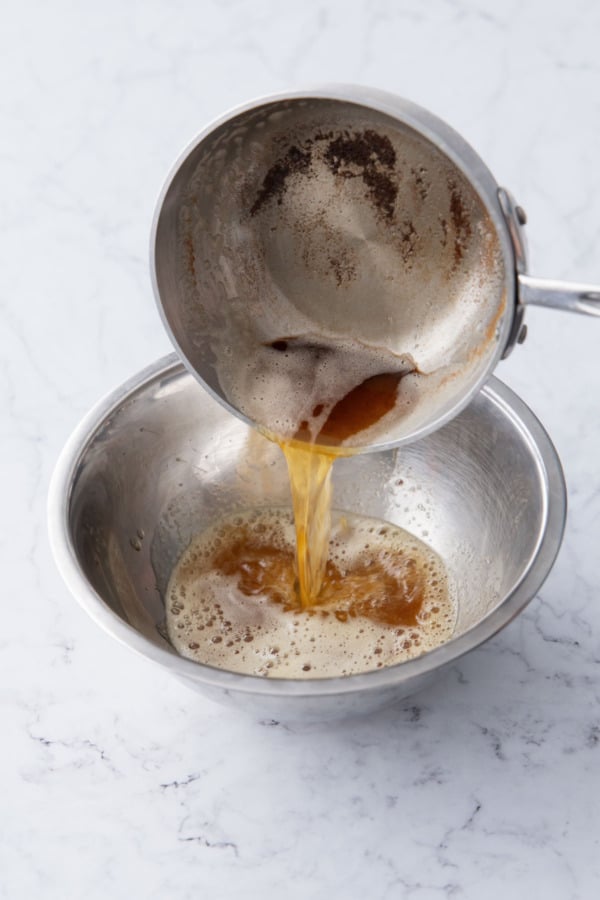
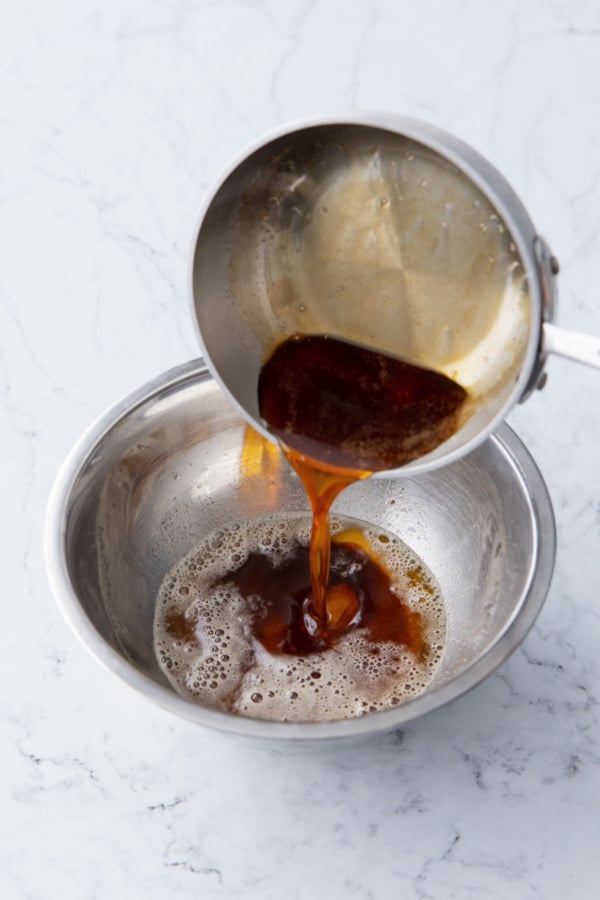
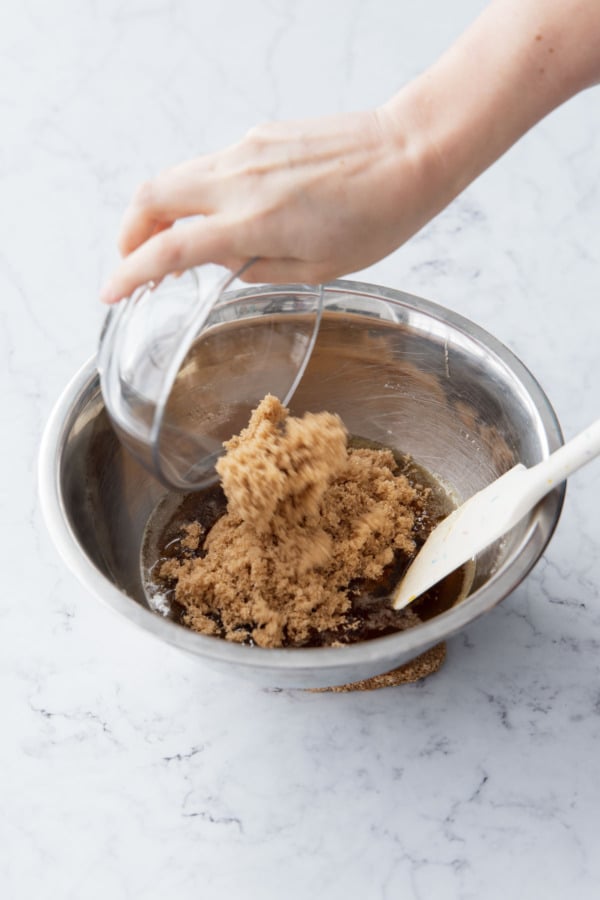
Optionally, to reduce the maple syrup, get out a small saucepan, and tare the weight on your digital scale (or make note of the empty weight before you begin). Measure 6 tablespoons or 120g of maple syrup, then bring to a boil over medium heat. Boil for 2 to 3 minutes, or until syrup has reduced to 100g (see why the scale comes in handy)? If you don’t have a scale, once the syrup starts to vigorously boil and foam, start a timer and boil for exactly 2 minutes. Remove from heat and pour into the bowl with the brown butter. (If you want to skip this step just add 100g of maple syrup directly to the butter.)
-
Let the butter and maple syrup mixture cool for 10 to 15 minutes, or until it is warm but no longer hot to the touch (it should measure under 120ºF on a digital thermometer, we don’t want to scramble the egg!) Add brown sugar and stir until evenly moistened.
-
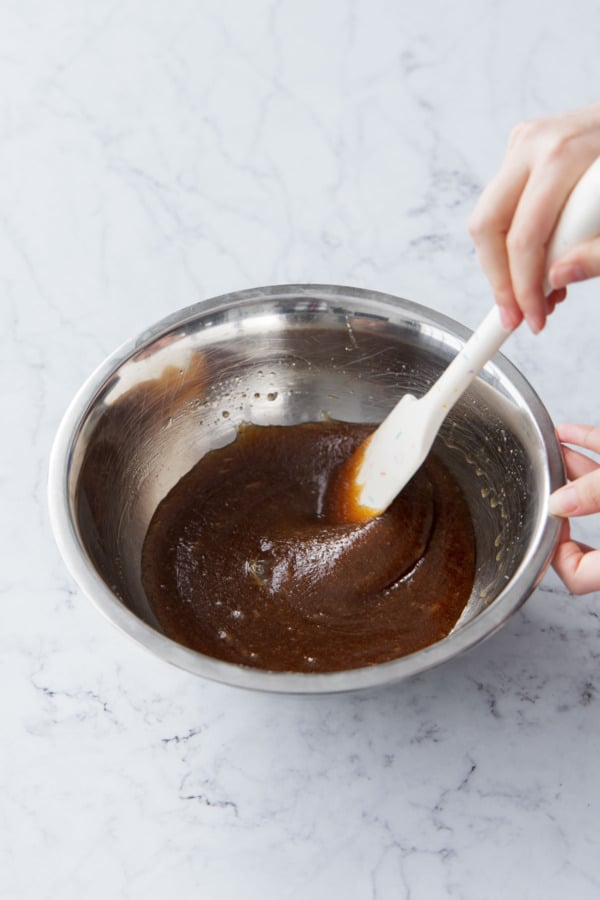
Add egg and mix well with a whisk or spatula until smooth and emulsified and there is no longer a visible slick of butter floating on top. Mix in vanilla and maple extracts.
-
In a separate bowl, whisk together flour, baking soda and salt until evenly incorporated. Add to the wet ingredients along with the maple sugar, and gently mix just until incorporated and no streaks of dry flour remain. Dough will be very soft but not sticky. You can bake it straight away, or let it firm up slightly after 10-15 minutes at cool room temperature (making it easier to handle).
-
Scoop about 3 tablespoons of dough (I use a heaping medium cookie scoop, about 40-43g of dough per ball by weight), roll into a smooth ball, and then roll to coat in maple or turbinado sugar.
-
Arrange on prepared cookie sheet, leaving about 2 inches of of space between cookies as they will spread quite a bit in the oven.
-
Bake for 11 to 13 minutes (slightly more or less depending on the size of your dough balls) or until tops are puffed and no longer raw-looking, and the edges are slightly darkened just a shade or two. Immediately after they come out of the oven, give them a good rap on the counter to deflate, then swirl a round cookie cutter slightly larger than the diameter of the cookie around the still-hot cookies to tuck in the edges and give them a perfectly circular shape.
-
Let cool on cookie sheet for 10 minutes, then transfer to a wire rack to cool completely. Cookies will keep in an airtight container for up to 3 days, refrigerated for up to 5, or in a zip-top bag in the freezer for up to 2 months.
- While reducing the maple syrup won’t make or break this recipe, I do recommend taking the extra few minutes to do so, as the final cookies are chewier and slightly more maple-intense. To reduce the maple syrup, heat 120g (about 3 fluid ounces) in a small saucepan over medium heat until it starts to boil. Continue to let it simmer, swirling the pan occasionally, for 2 to 3 minutes until the volume reduces to 1/3 cup or 100g by weight (remember to tare your scale first with the weight of the saucepan, and this part is really easy to measure!)
- Maple sugar is optional for this recipe. If omitting, add 10g or a scant 1 tablespoon of brown sugar to the dough, and you can opt to roll in granulated or raw/turbinado sugar instead.
All images and text © for Love & Olive Oil.
There may be affiliate links in this post. We are a participant in the Amazon Services LLC Associates Program, an affiliate advertising program designed to provide a means for us to earn fees by linking to Amazon.com and affiliated sites.


 these flavor-packed cookies are also made with browned butter for a toasty, nutty, and—especially when paired with maple— an almost butterscotch-like flavor. And as an added bonus, because the dough)